


When I started learning about this whole CI/CD thing over a year ago — it was honestly confusing. I mean — I understood what deployment meant and saw tons of value in it, but the rest of it was greek to me.
Reading, tinkering, and 30 hours later — I've got some things figured out, and what I aim to do in this article is share how I understand it all and how you can set up an auto deploy process using a GitHub Action.
Primer
First — I should warn you that setting up a GitHub Action requires more than a few steps. You will need access to your hosting environment and have FTP, SFTP, or SSH access in many cases.
This article will focus strictly on SSH.
SSH Keys
Rather than excite you by diving right into the GitHub Action .yml file, let's get the hard stuff out of the way first and address the SSH Keypair thingy ma-bob.
Using SSH keys is a different way of authenticating into a server. Instead of using a username and password, you will supply a username and an SSH key instead.
SSH keys come in a pair — one is public and the other private.
Depending on what you're configuring, it may require you to provide one or the other — and in our case, to set up this auto deploy process, we will be using the private key.
SSH Key Generator
First — you'll need to log in to your server over SSH.
ssh username@ip-address
Next, enter your password and once you're in, run the following command.
ssh-keygen -m PEM -t rsa -b 4096.
You will then be asked a series of questions; it's ok to smash that enter button several times till the end.
Now, go ahead and add your public key to your "authorized key" on the server. This step is crucial because I spent a ton of time troubleshooting why my auto deploy didn't work, and it's because I missed this step.
cat id_rsa.pub >> ~/.ssh/authorized_keys
Once that's done, run the following command, which will provide you with the secret SSH key. This will be the key we need when setting up the deployment using GitHub Actions.
cat ~/.ssh/id_rsa
If you're interested in learning more about SSH Keys, check out the link below.
ssh.com/academy/ssh/public-key-authentication
Create Deploy Steps
Now for the fun part — head over to your GitHub repo and click on the "Actions" tab located at the top. This will bring you to a screen with tons of options, but don't fear, find the "Node.js" option and click "Set up this workflow."
That will bring you to a screen with the following code.
# This workflow will do a clean install of node dependencies, build the source code, and run tests across different versions of the node
# For more information see: https://help.github.com/actions/language-and-framework-guides/using-nodejs-with-github-actions

name: Node.js CI

on:
  push:
    branches: [ master ]
  pull_request:
    branches: [ master ]

jobs:
  build:

    runs-on: ubuntu-latest

    strategy:
      matrix:
        node-version: [12.x, 14.x, 16.x]
        # See supported Node.js release schedule at https://nodejs.org/en/about/releases/

    steps:
    - uses: actions/checkout@v2
    - name: Use Node.js ${{ matrix.node-version }}
      uses: actions/setup-node@v2
      with:
        node-version: ${{ matrix.node-version }}
    - run: npm ci
    - run: npm run build --if-present
    - run: npm test
This can seem overwhelming at first, but I'll break it down the way I understood it.
First, we need an environment or operating system that will allow us to run all of our fancy build process stuff. So, it needs to install Ubuntu first.
Then, we need Node.js installed to do things like "npm install" or "npm run build," or else it would'nt know what to do. When that is all set up and ready to go, it will install our dependencies and build the files we want to deploy.
Okay — so now our files are built, but we haven't told it where we want them to go.
If we look to our right, we will see a panel with a search bar and a list of options. Search for "ssh deploy," and you should see the option below.
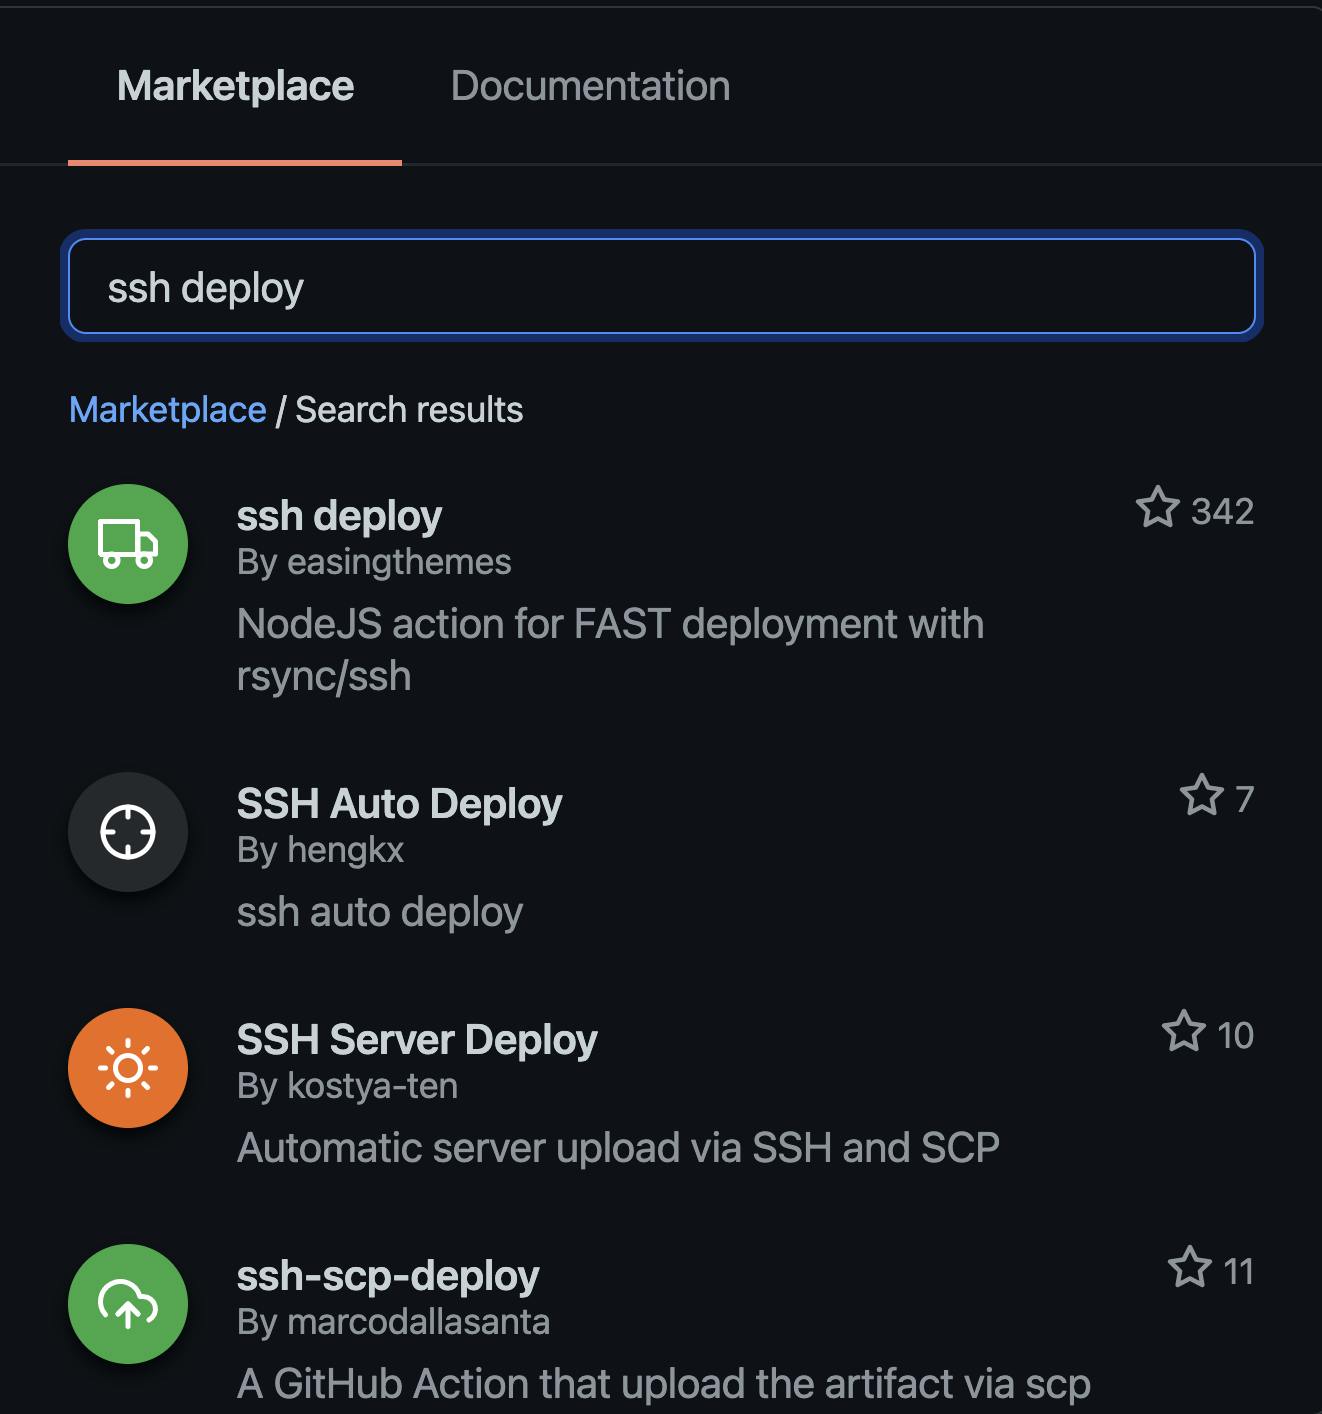
Select "ssh deploy," scroll down, then copy and paste the following code at the bottom of your .yml file.
- name: ssh deploy
   uses: easingthemes/ssh-deploy@v2.2.11
   with:
      SSH_PRIVATE_KEY: ${{ secrets.SSH_PRIVATE_KEY }}
      REMOTE_HOST: ${{ secrets.SERVER }}
      REMOTE_USER: ${{ secrets.USERNAME }}
      TARGET: ${{ secrets.PRODUCTION_DIR }}
Secrets
You may have noticed that we added some variables above; those are called "secrets," which we will need to create by visiting the repo settings page within GitHub and selecting "Secrets" at the bottom left of the menu.
Select "New repo secret" and begin creating the variables we set above. As you create your variables, pay close attention to these important things:
- SSH_PRIVATE_KEY: You will need to get your private SSH key by logging into your server through the terminal and running
cat ~/.ssh/id_rsa, which will print out your private SSH key on the screen. Copy the entire block including -----BEGIN RSA PRIVATE KEY----- and -----END RSA PRIVATE KEY----- - REMOTE_HOST: The server IP address
- REMOTE_USER: The same username you use to login through SSH
- TARGET: Target will be the full directory path where you want to deploy your files i.e. /var/www/vhosts//httpdocs/staging/web/app/
Make sure that you create the folder on your server ahead of time, or the deployment process will fail.
Okie dokes! With all of that now out of the way, it's time to start testing!
Testing your auto deploy
To test your auto deploy, commit a change and push it up to your main branch. Visit the actions tab within your repo, and you should see a build in progress. Click on the build process to see it all in action. (no pun intended)
Setting up different branches
There are many different ways to set up and configure how and where your deployments go. In a fully fleshed-out example below, you will see that we deploy to a staging site whenever a push occurs on the staging branch and deploying to the production site whenever a push occurs on the main branch.
# This workflow will do a clean install of node dependencies, build the source code, and run tests across different versions of node
# For more information see: https://help.github.com/actions/language-and-framework-guides/using-nodejs-with-github-actions

name: Auto Deploy

on:
  push:
    branches: [main, staging]

jobs:
  build:
    runs-on: ubuntu-latest

    strategy:
      matrix:
        node-version: [14.x]
        # See supported Node.js release schedule at https://nodejs.org/en/about/releases/

    steps:
      - uses: actions/checkout@v2
      - name: Setup Node.js ${{ matrix.node-version }}
        uses: actions/setup-node@v2
        with:
          node-version: ${{ matrix.node-version }}
      - name: Install dependencies
        run: npm install
      - name: Build files
        run: npm run build --if-present

      - name: Deploy staging
        if: github.ref == 'refs/heads/staging'
        uses: easingthemes/ssh-deploy@v2.2.11
        env:
          SSH_PRIVATE_KEY: ${{ secrets.SSH_PRIVATE_KEY }}
          REMOTE_HOST: ${{ secrets.SERVER }}
          REMOTE_USER: ${{ secrets.USERNAME }}
          TARGET: ${{ secrets.STAGING_DIR }}
          EXCLUDE: ".git*, .github*, node_modules*, src*, webpack.config.js"

      - name: Deploy production
        if: github.ref == 'refs/heads/main'
        uses: easingthemes/ssh-deploy@v2.2.11
        env:
          SSH_PRIVATE_KEY: ${{ secrets.SSH_PRIVATE_KEY }}
          REMOTE_HOST: ${{ secrets.SERVER }}
          REMOTE_USER: ${{ secrets.USERNAME }}
          TARGET: ${{ secrets.PRODUCTION_DIR }}
          EXCLUDE: ".git*, .github*, node_modules*, src*, webpack.config.js"
Wrapping up
If you made it this far in the article, that means you love reading, or it's not working.
If it's the latter — go back and read some of the beginning steps about generating and copying the private key.
Pay close attention to the "authorized keys" part as well — as it turns out — this was the part where I spent a lot of time on and stumbled quite a bit.
Like or comment if you found this helpful, and say hello on Twitter!